Create And Design Your First Email Campaign On Nudge
In this video, we will show you how to create your very first email campaign on Nudge — from your brief all the way to a fully designed email that is ready to send.
Introduction To Email Campaigns
Nudge takes the hard work out of email marketing. You describe what you want to run, the AI builds the strategy and design, and you tweak it to perfection. Let's walk through it together.
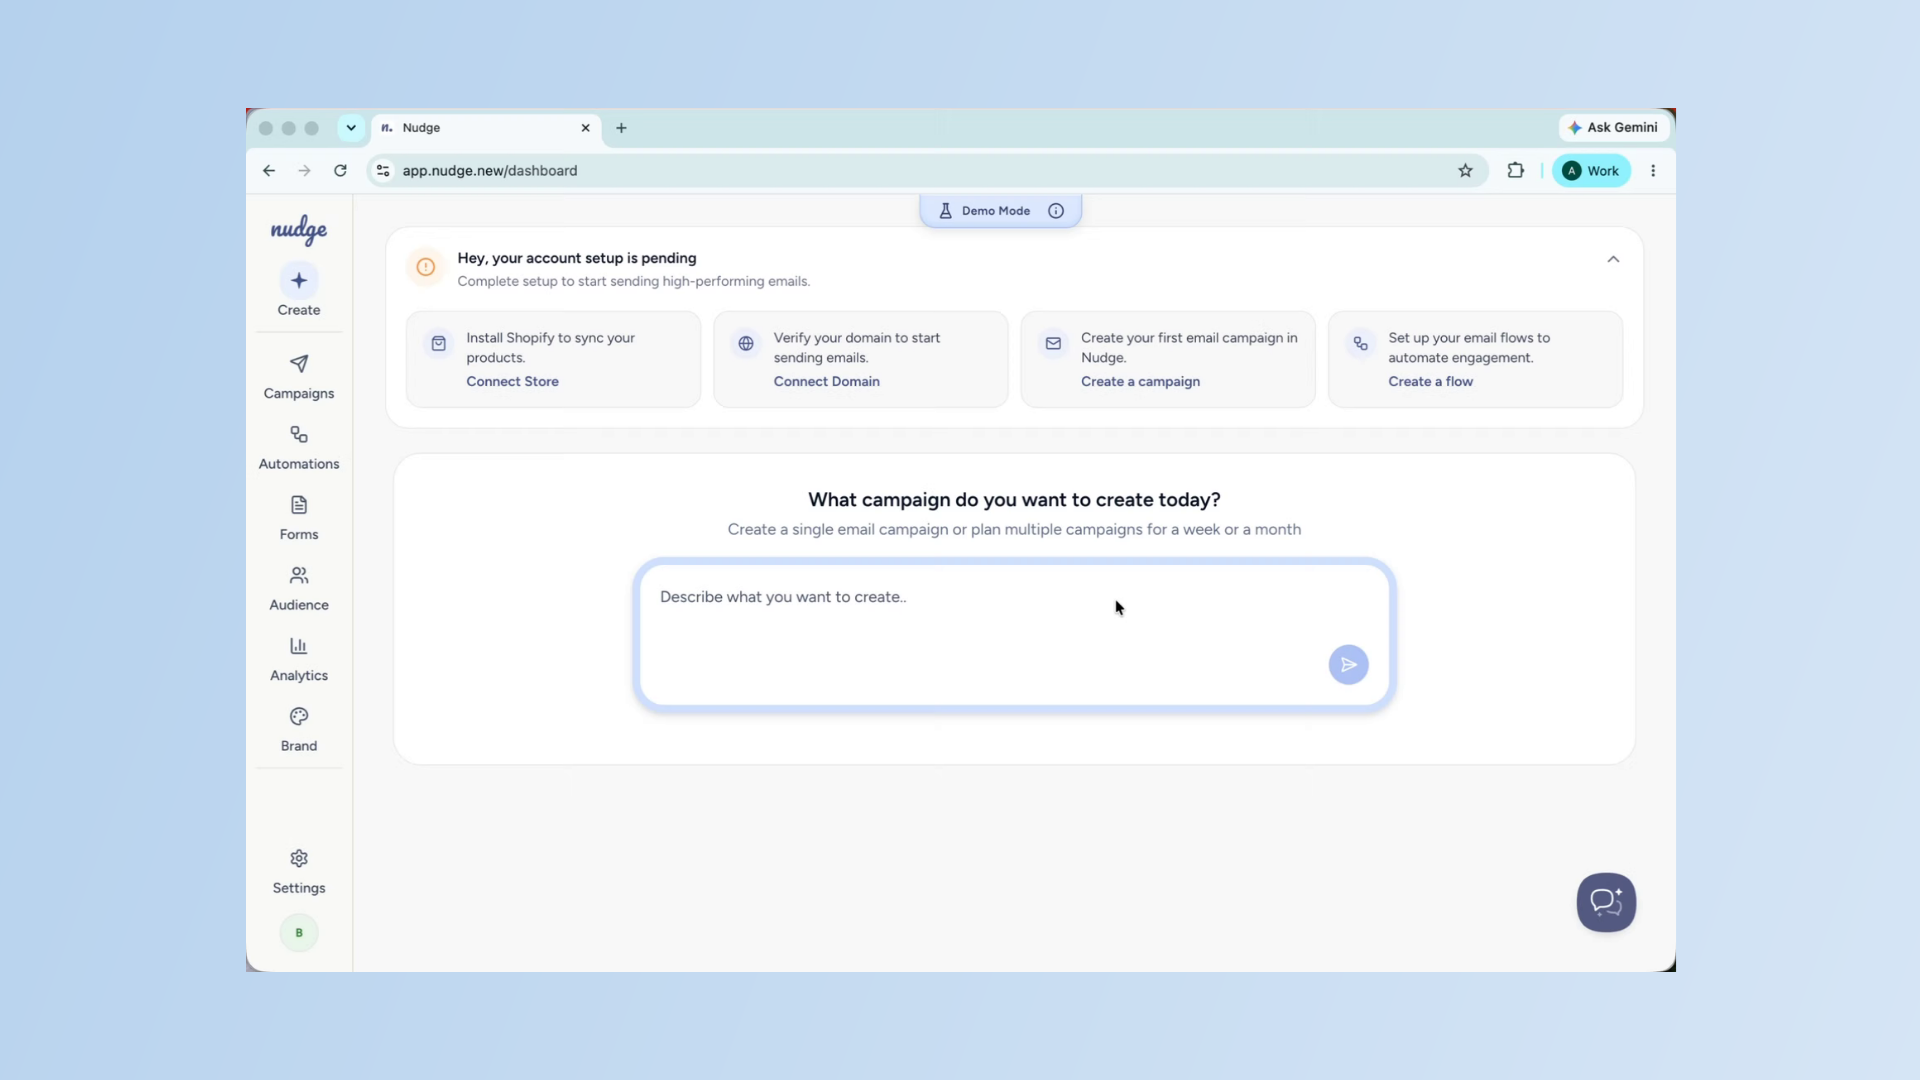
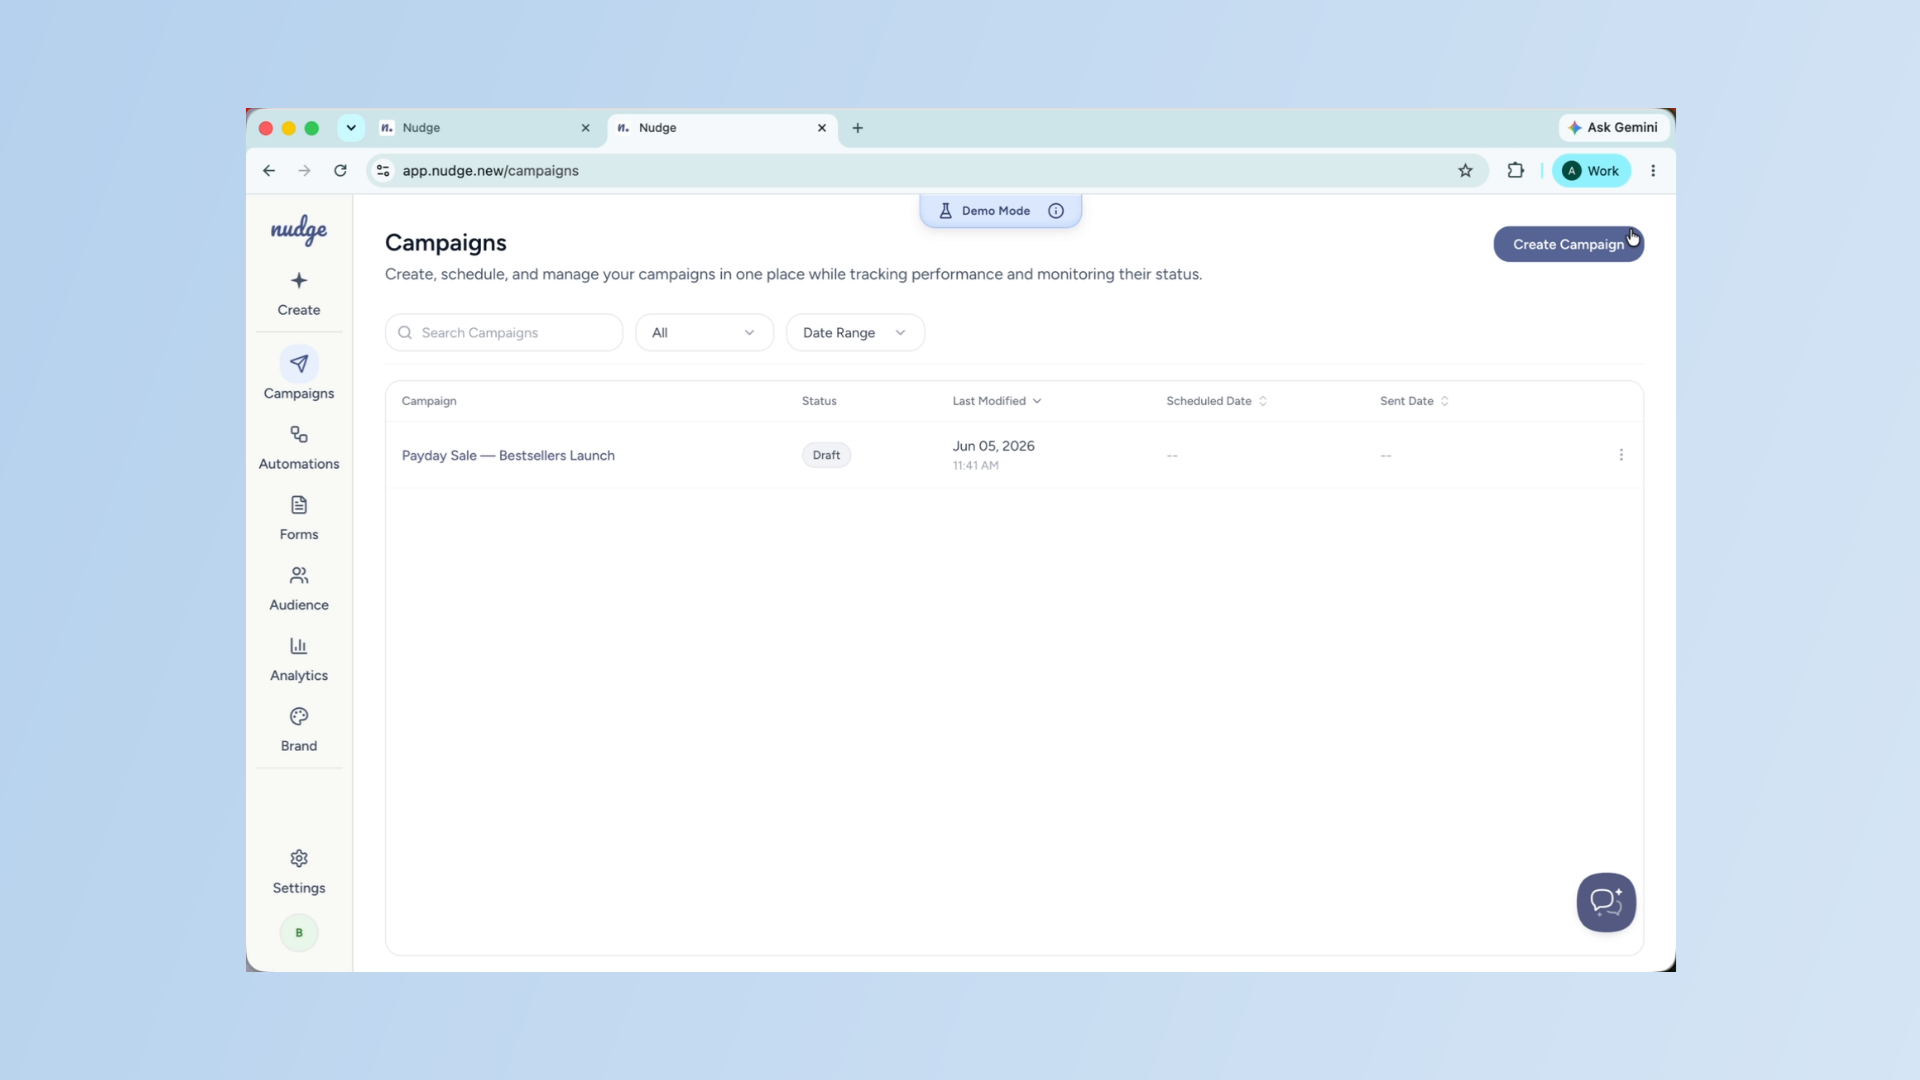
Start Campaign From Dashboard
From the dashboard, click on Campaigns in the left panel and hit Create Campaign. This takes you straight to the campaign chat — your starting point for every email you send on Nudge.

Describe Your Campaign Brief
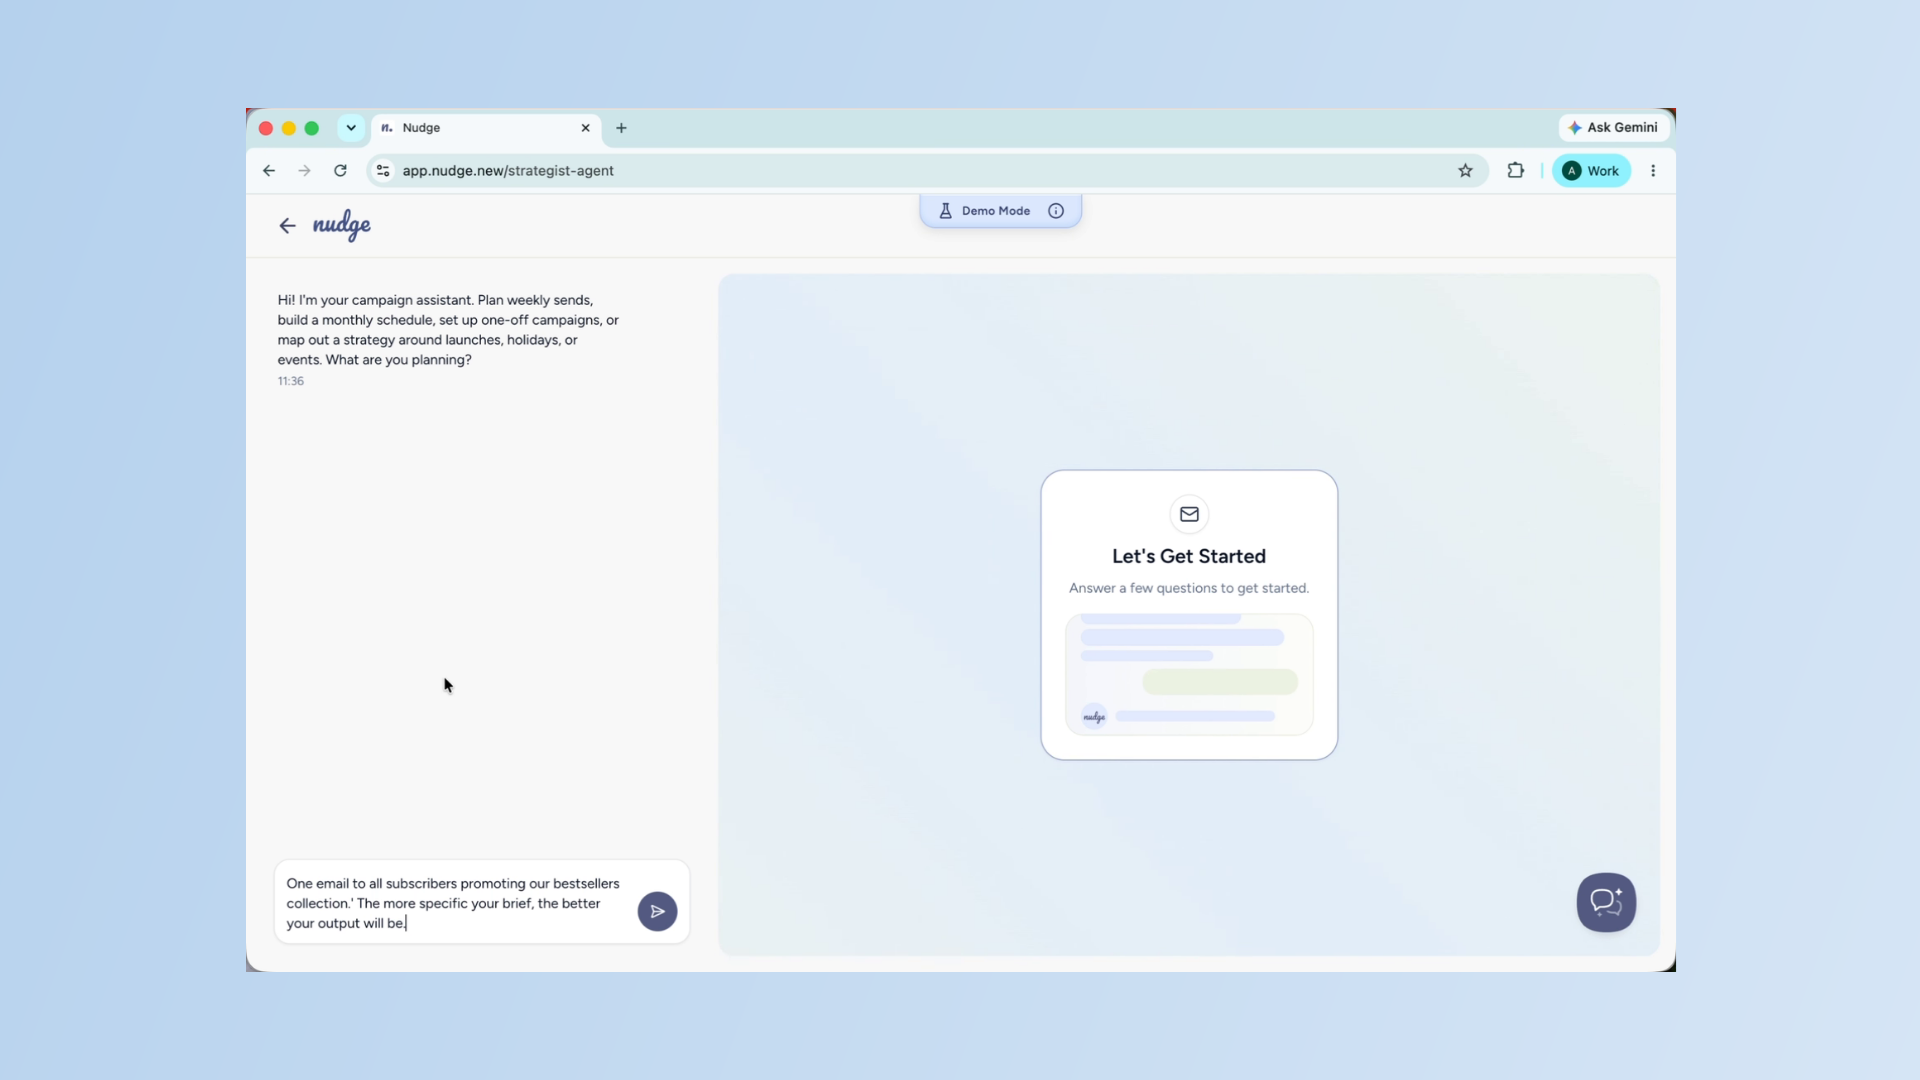
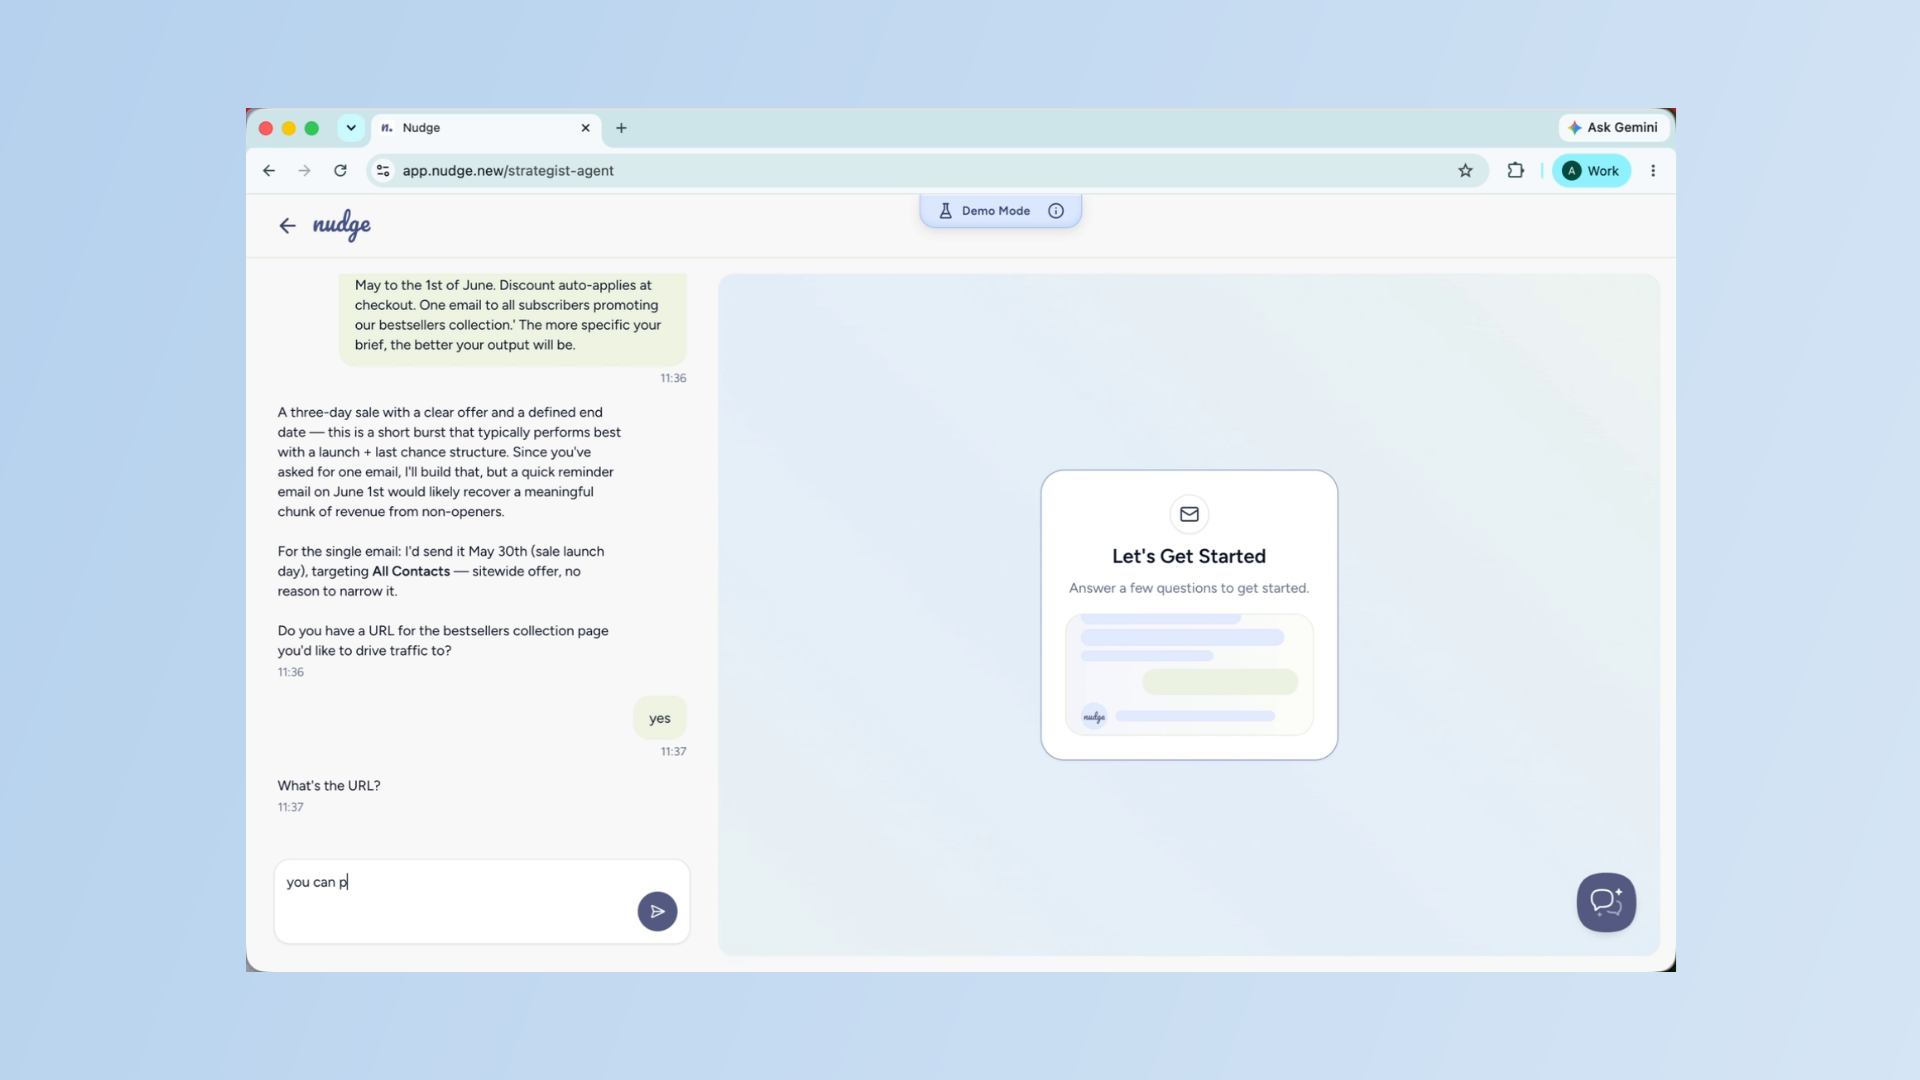
In the description field, tell Nudge what you are running. For this example we are doing — 'A sitewide 20% off Payday Sale from the 30th of May to the 1st of June. Discount auto-applies at checkout. One email to all subscribers promoting our bestsellers collection.' The more specific your brief, the better your output will be.
Send Brief To Generate Plan
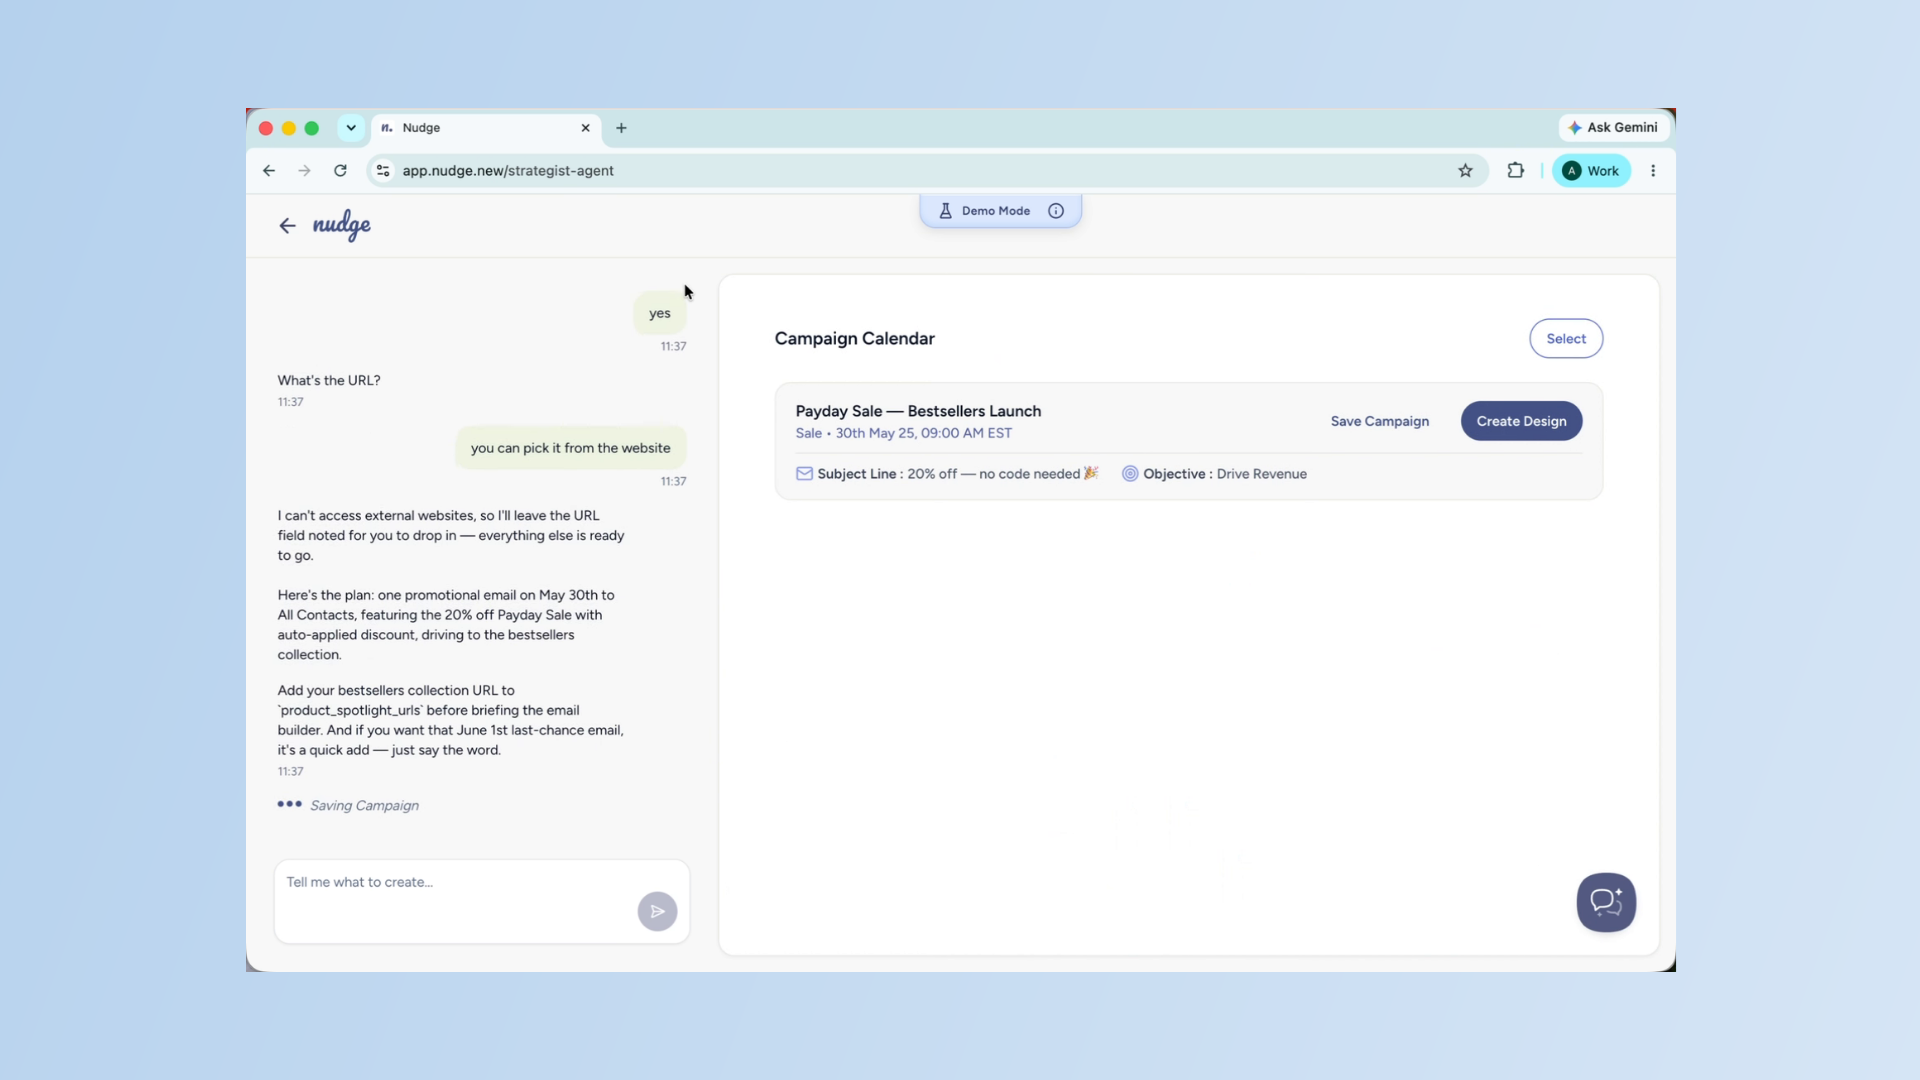
Hit send and Nudge gets to work. It reads your brief, maps out how many emails to send, what each one should focus on, and when to send them. You will see the full plan laid out for you to review.
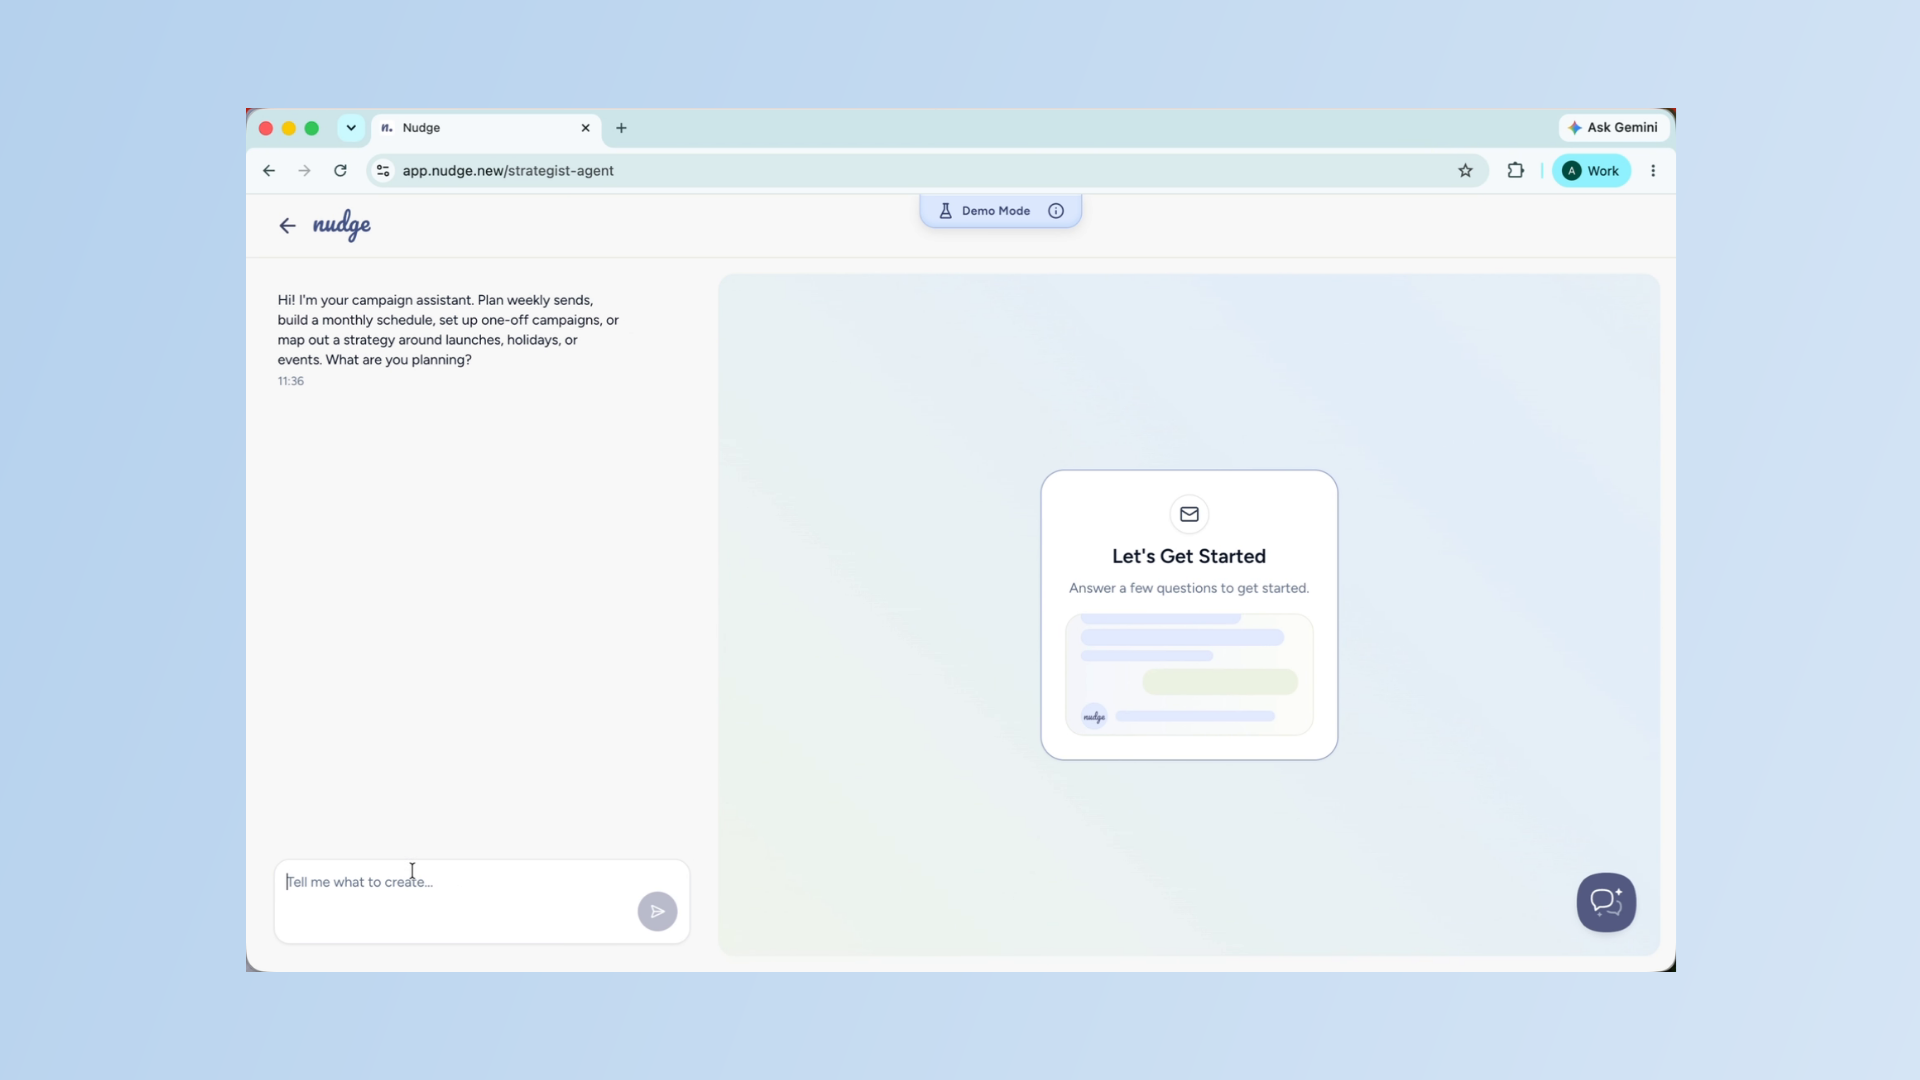
Enter Campaign Creation Request
Enter your campaign creation request in the chat to guide Nudge on what to build.
Review The Campaign Plan
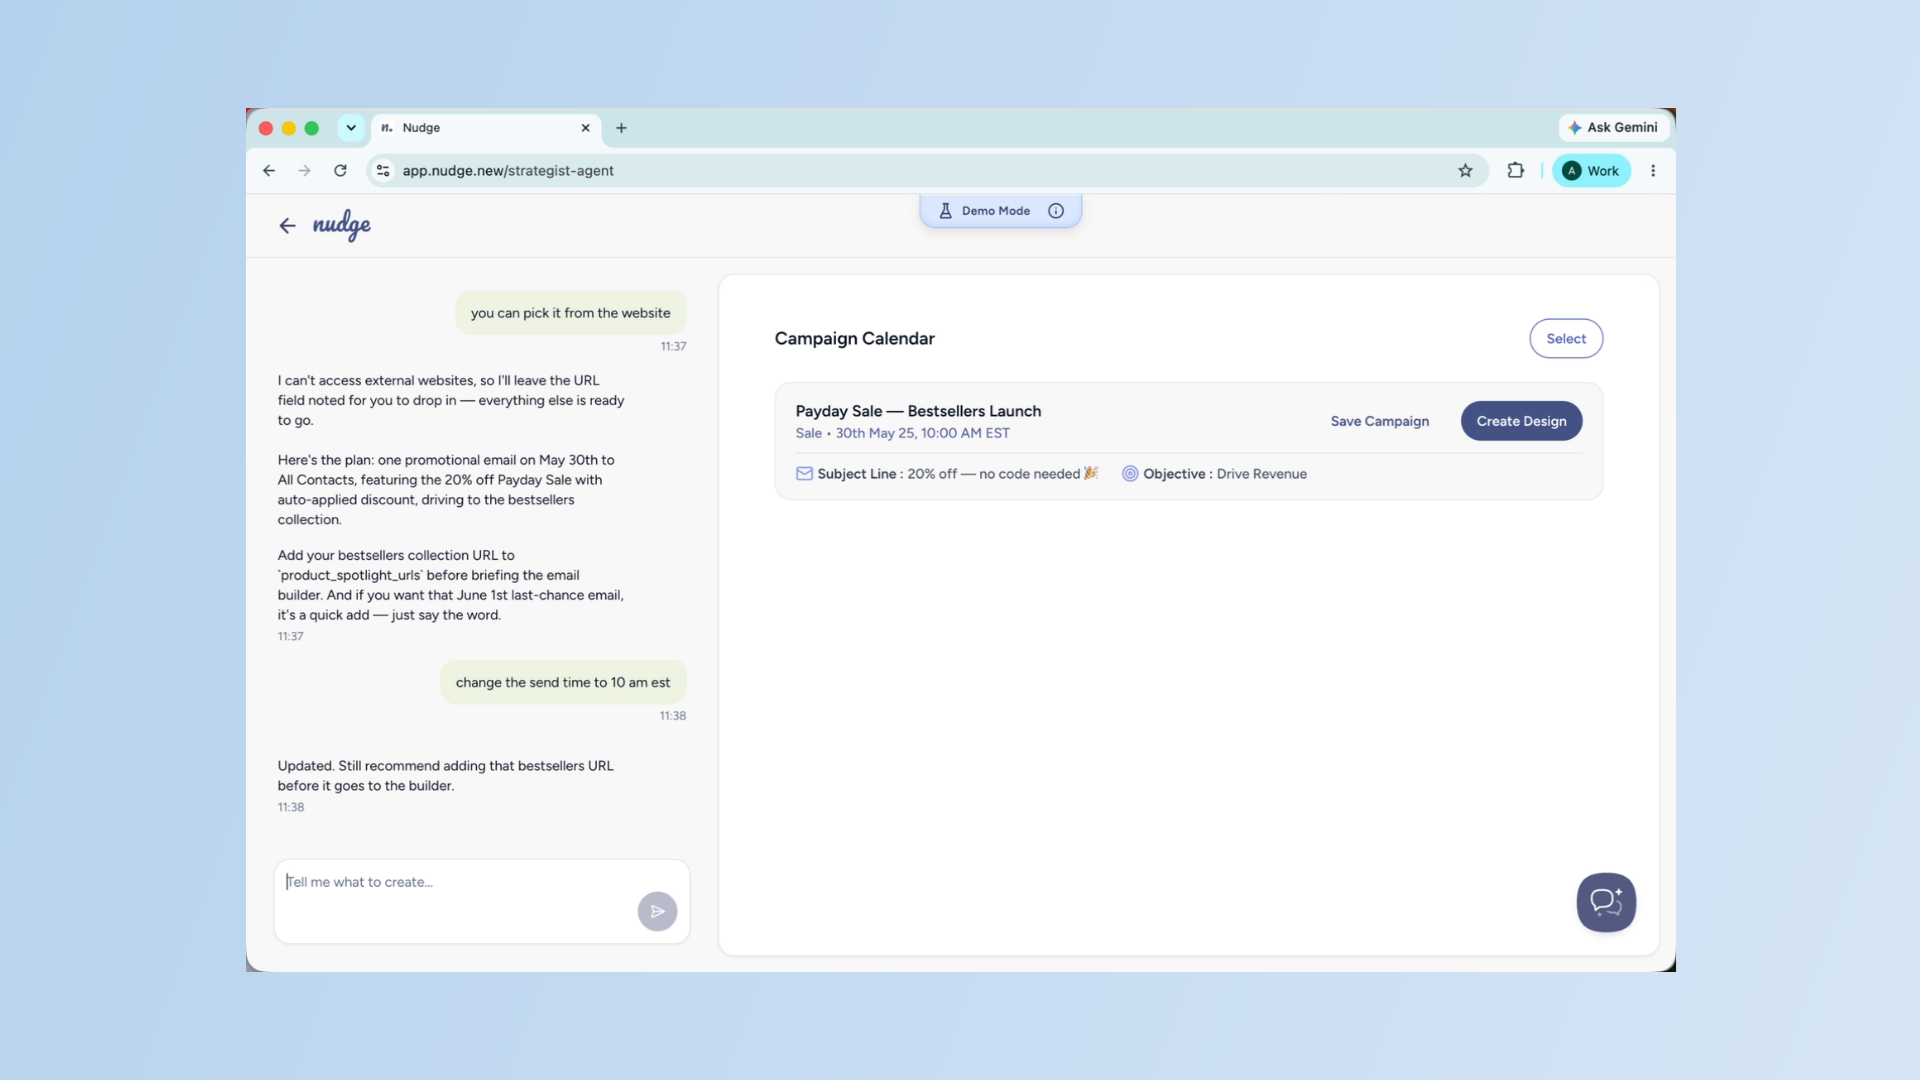
Take a moment to look over the plan. If something does not feel right — a different angle on the subject line, one fewer email, a different send time — just tell Nudge in the chat and it will update instantly. This is your chance to shape the campaign before any design work begins.
Create Fully Designed Email
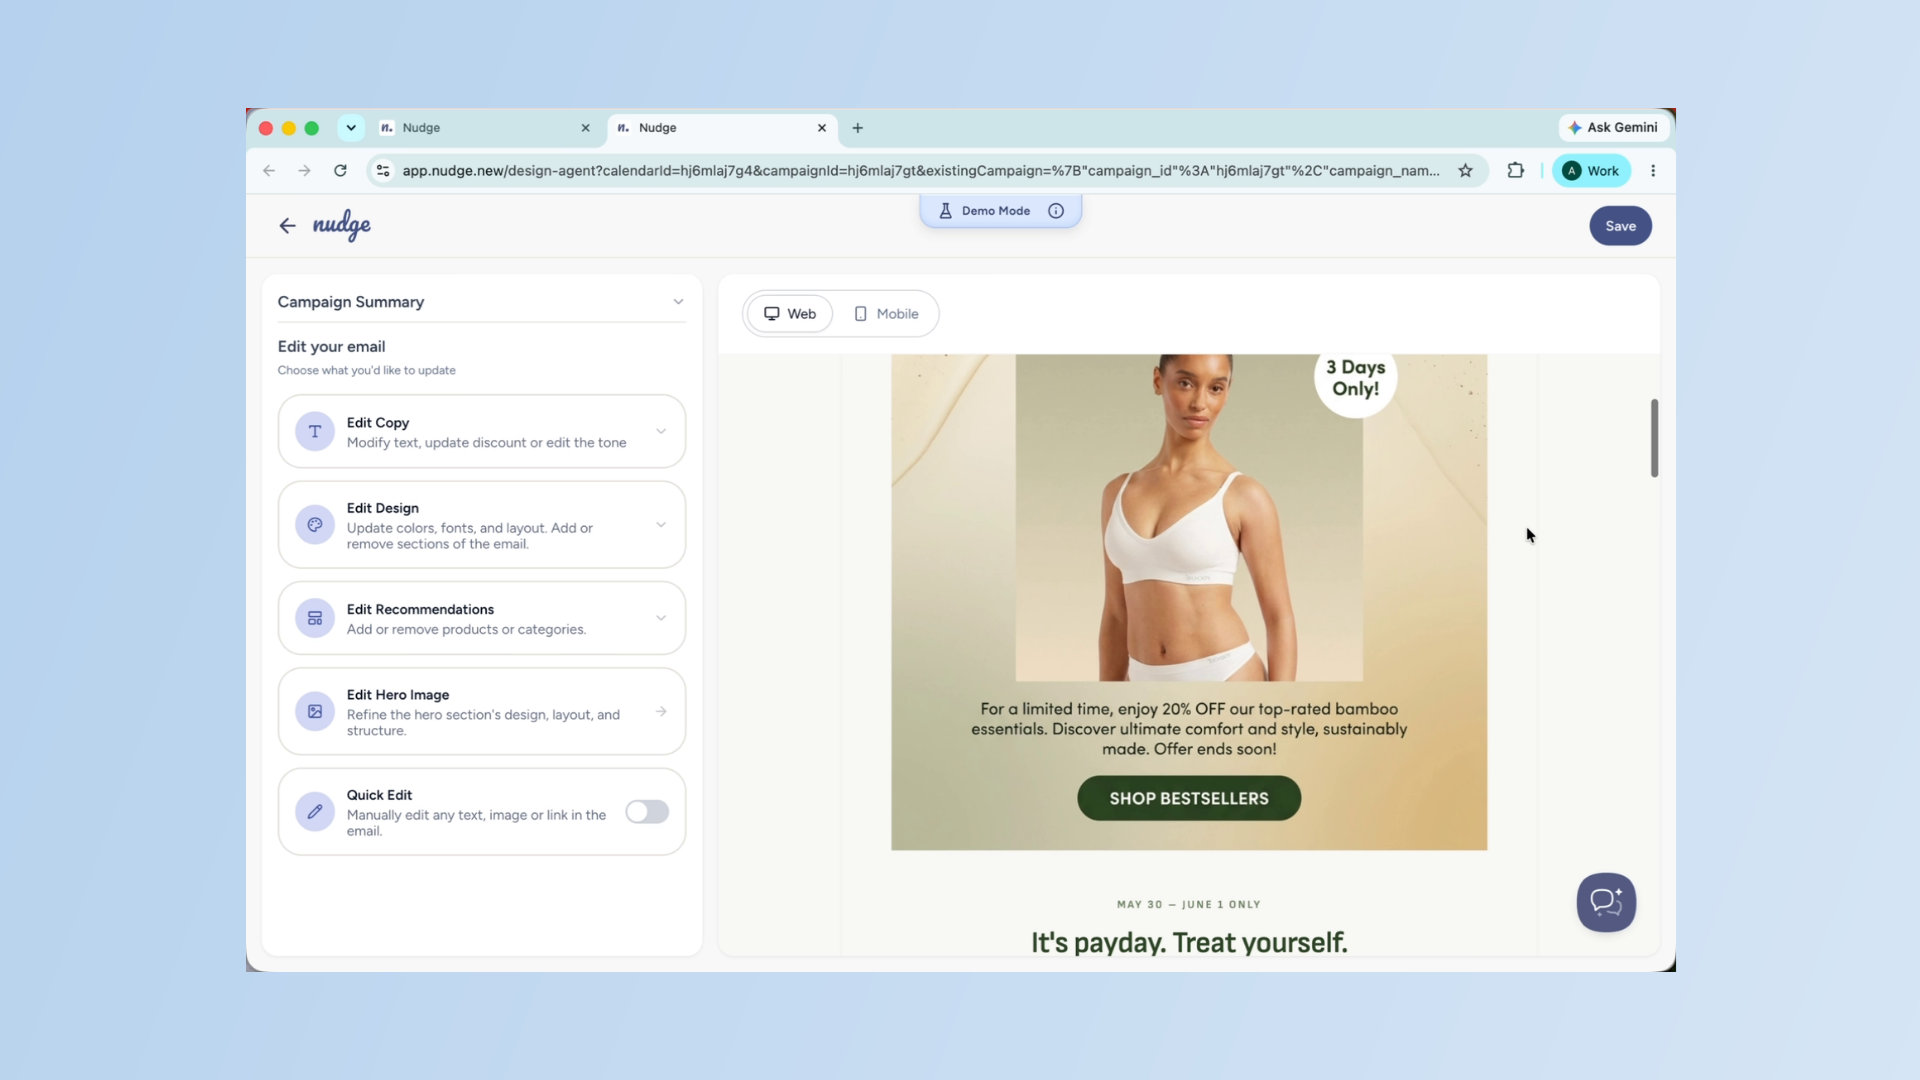
Happy with the plan? Click Create Design. Nudge will now build a fully designed email using your brand colours, fonts, and campaign details. Give it a few seconds — it is doing quite a lot behind the scenes.
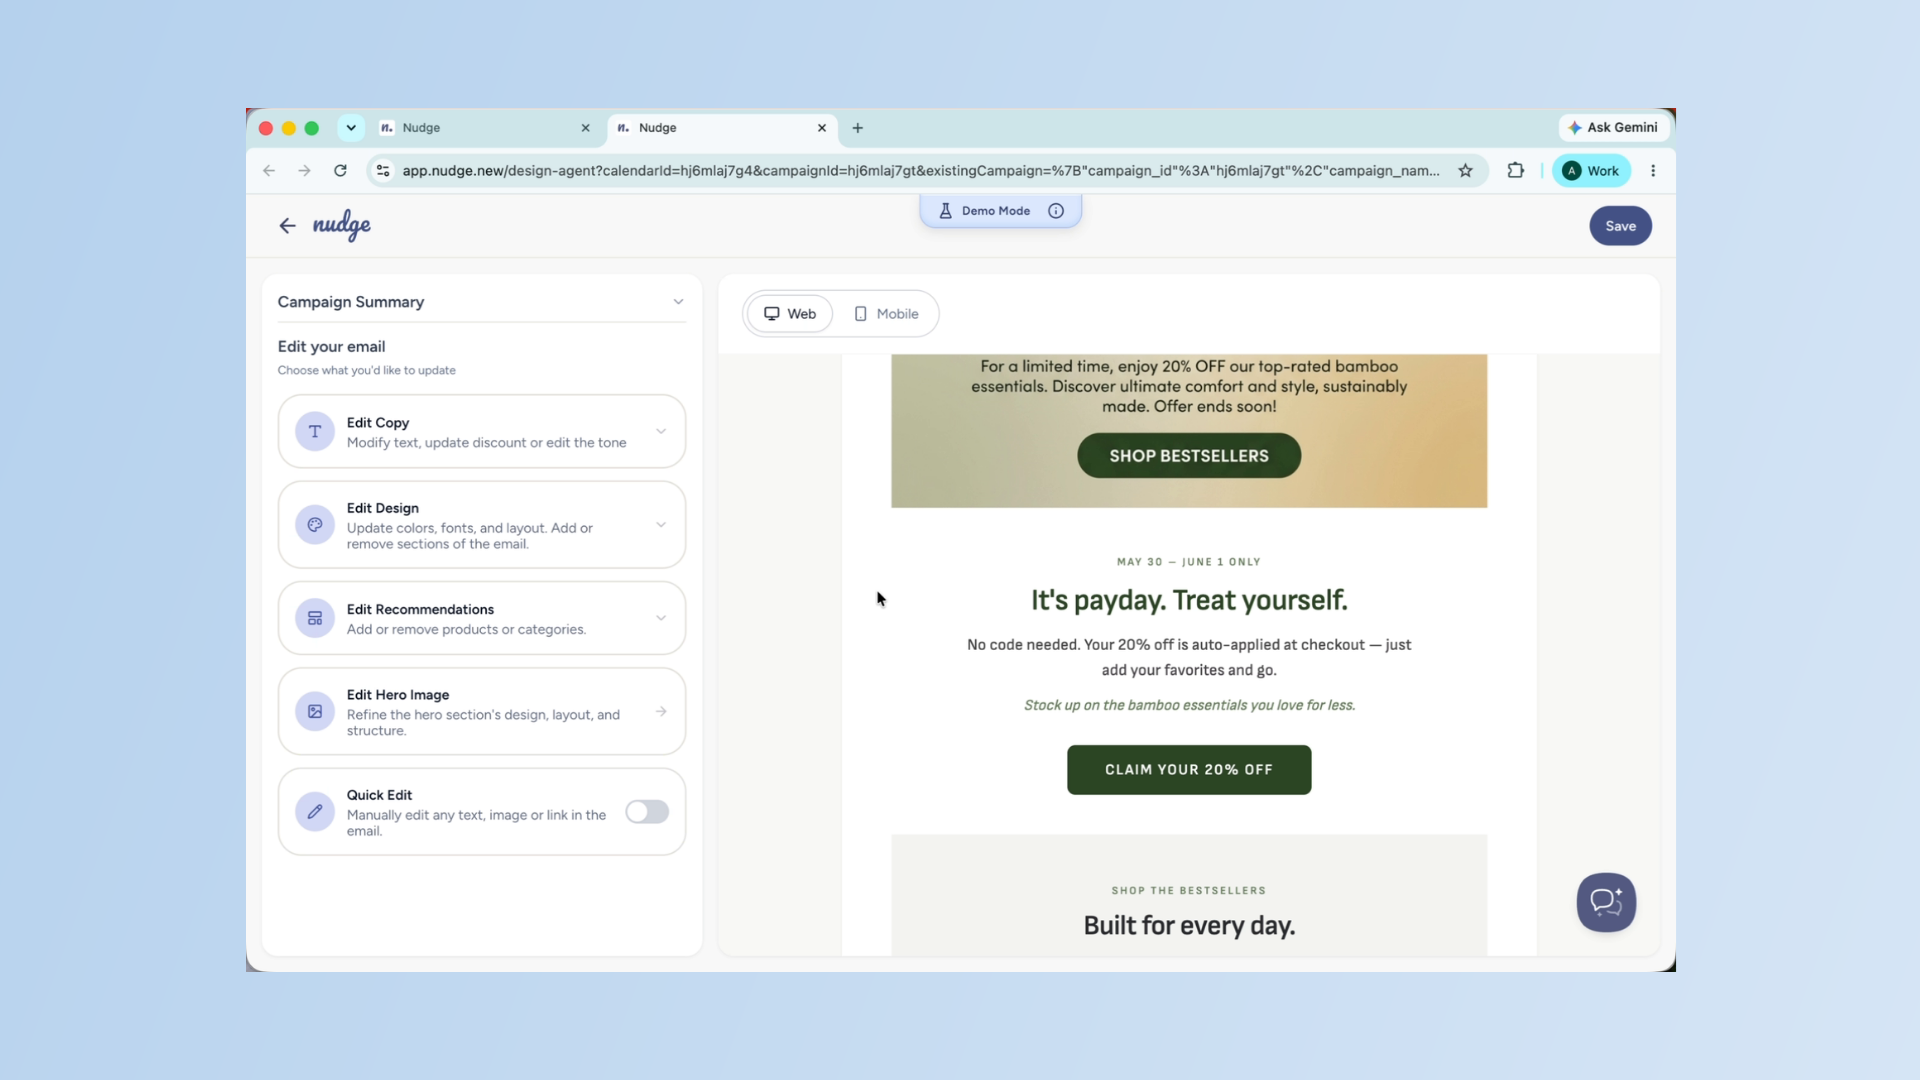
Edit Email Copy Options
Once your design is ready, you will see a panel on the left with several editing options. Starting with Edit Copy — this is where you can modify any text in the email. That includes your body copy, headings, subject line, CTA, promotional messaging, and even the overall tone. If something does not sound quite right, this is the first place to go.
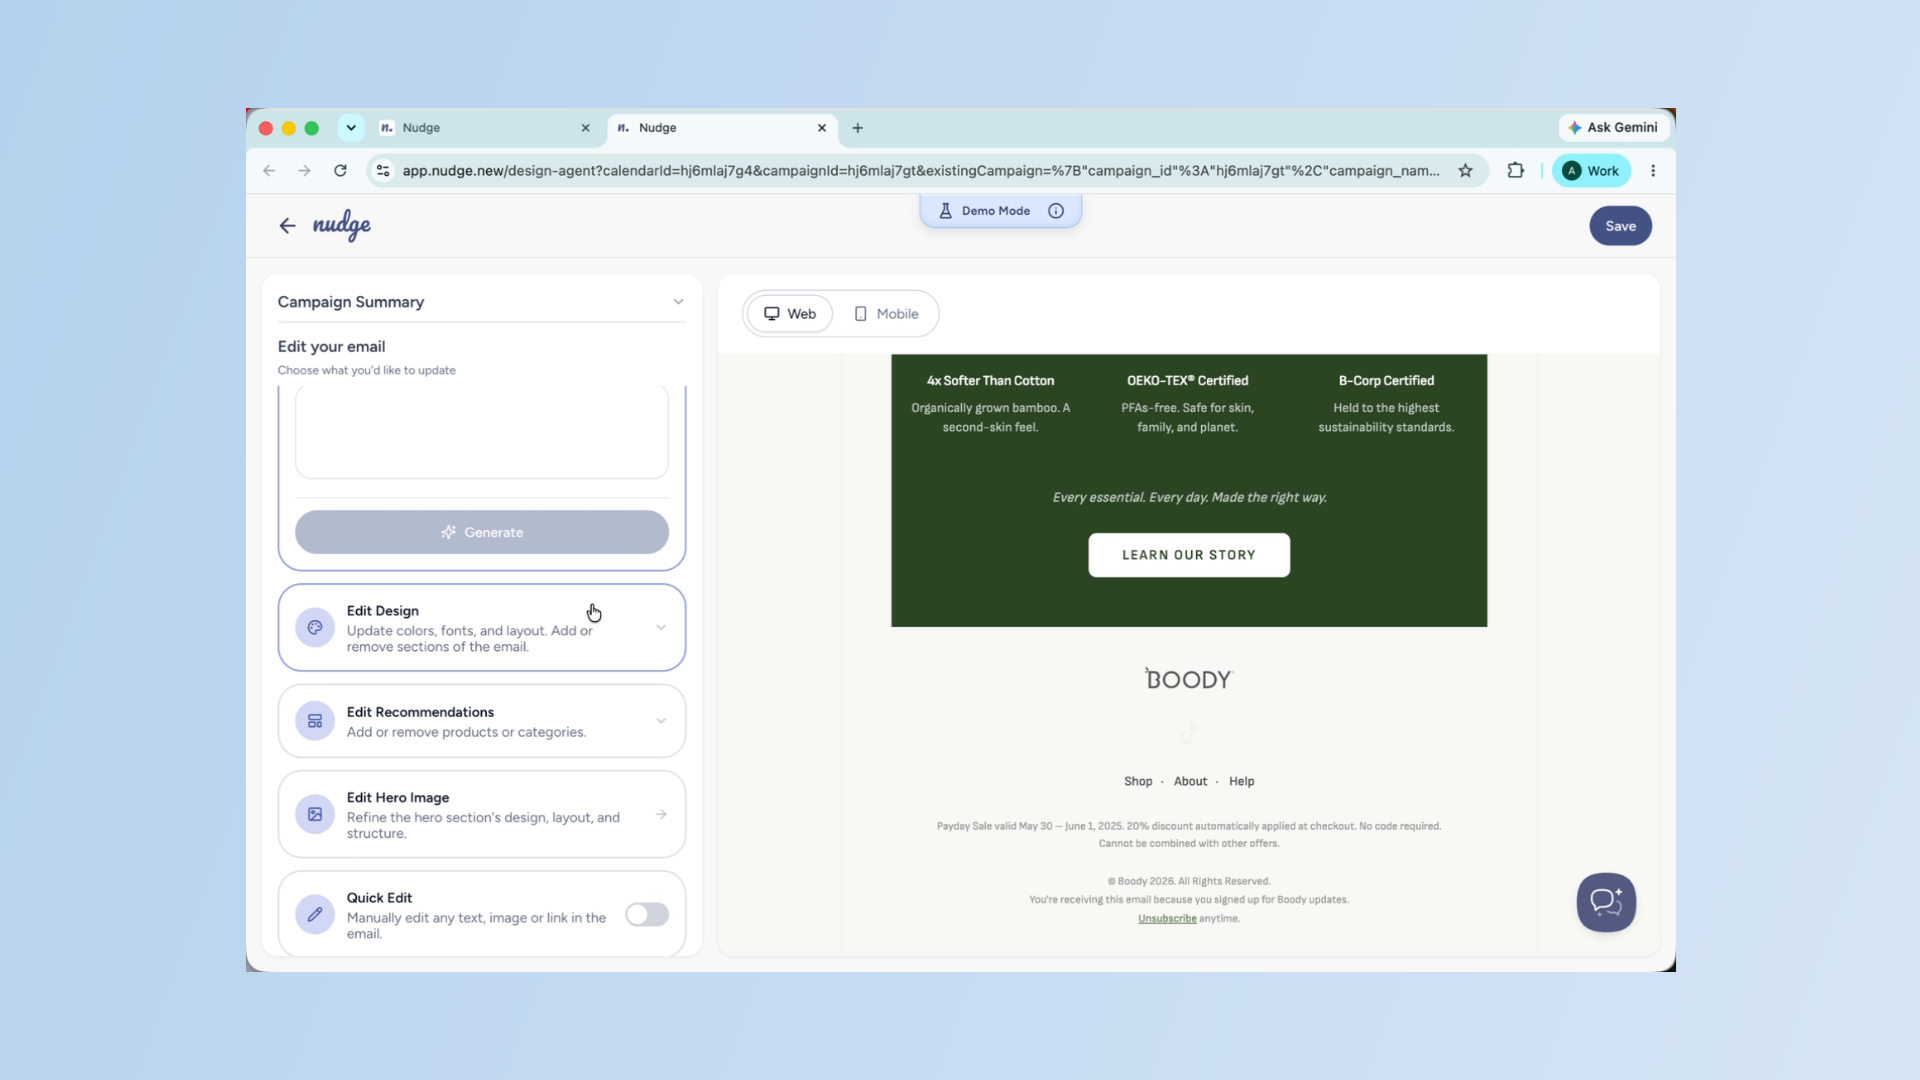
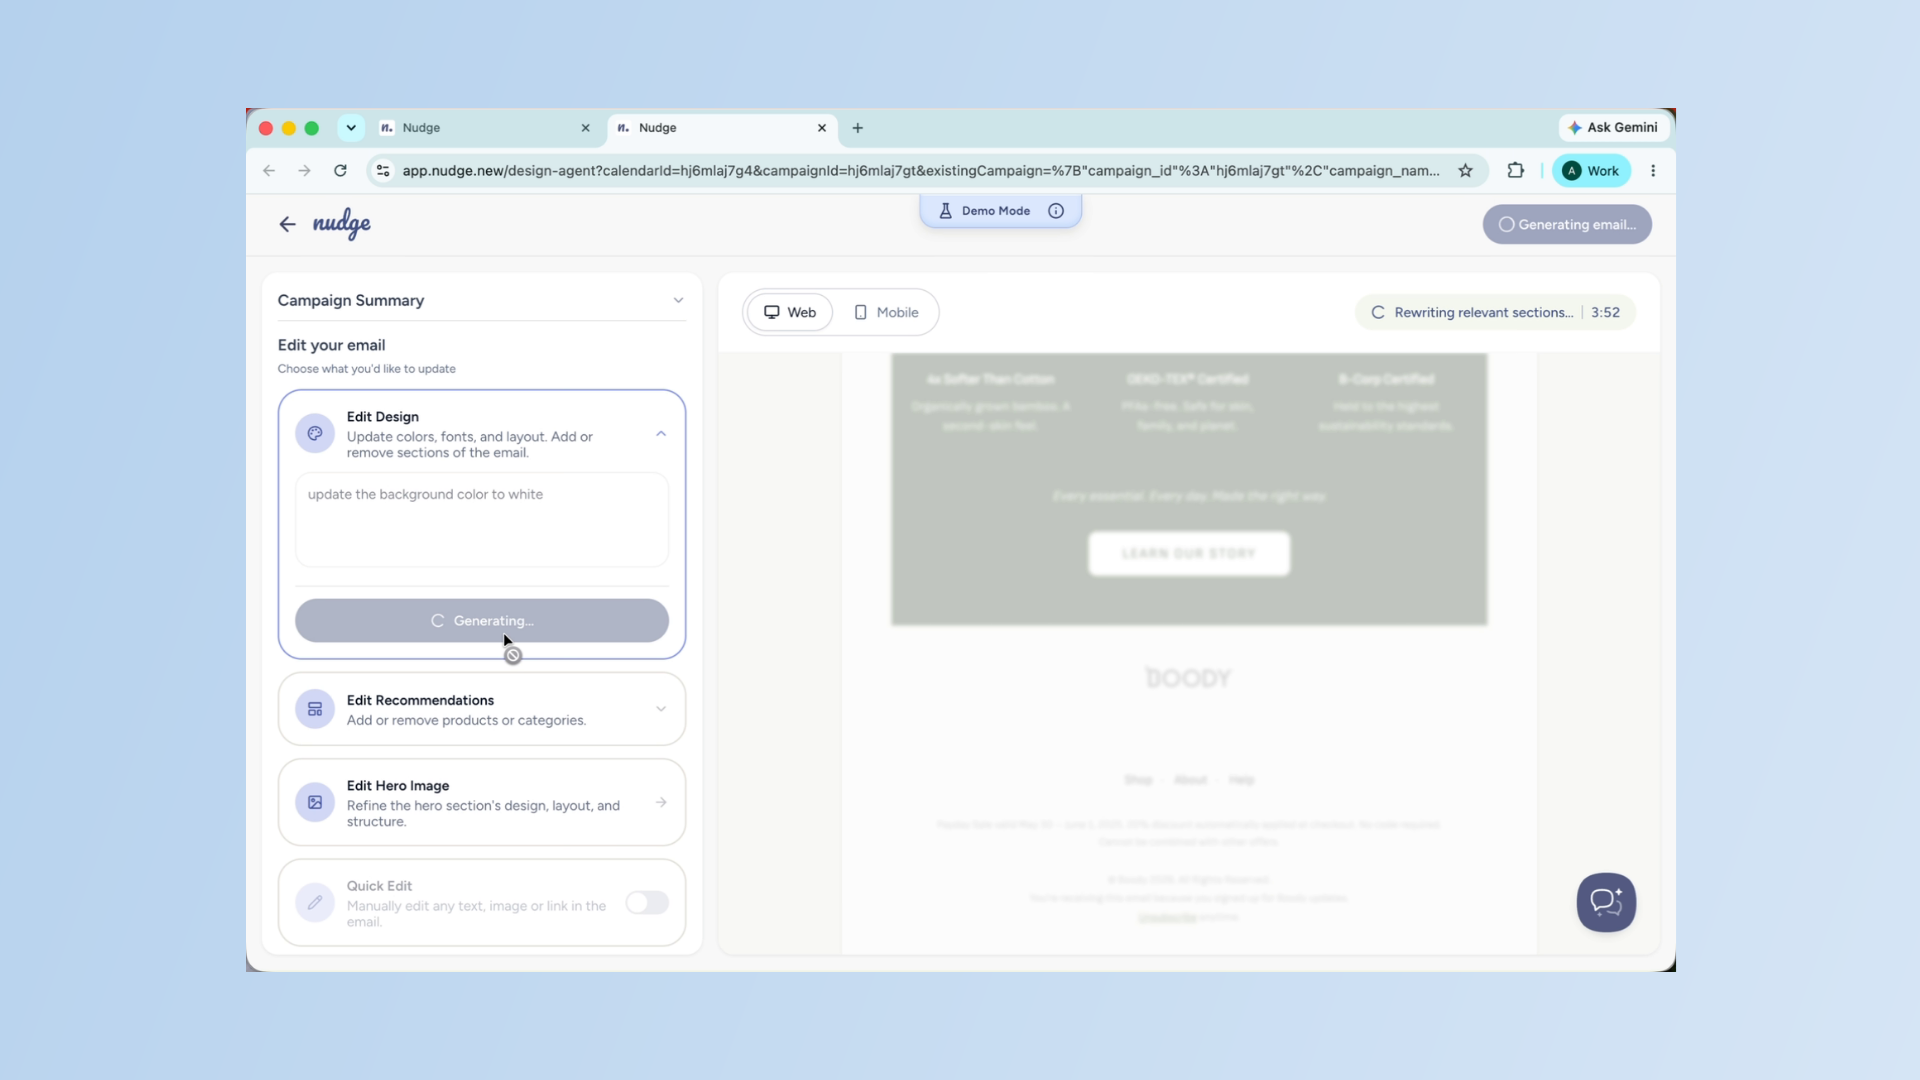
Use Design Editing Features
Edit Design lets you update the visual side of your email — colours, fonts, layouts, and the overall block structure. You can add new sections, remove existing ones, or reposition content blocks. For example, you could insert a product description block between the hero and the product recommendations, or update the background colour to better match your campaign.
Use Design Editing Features - Segment

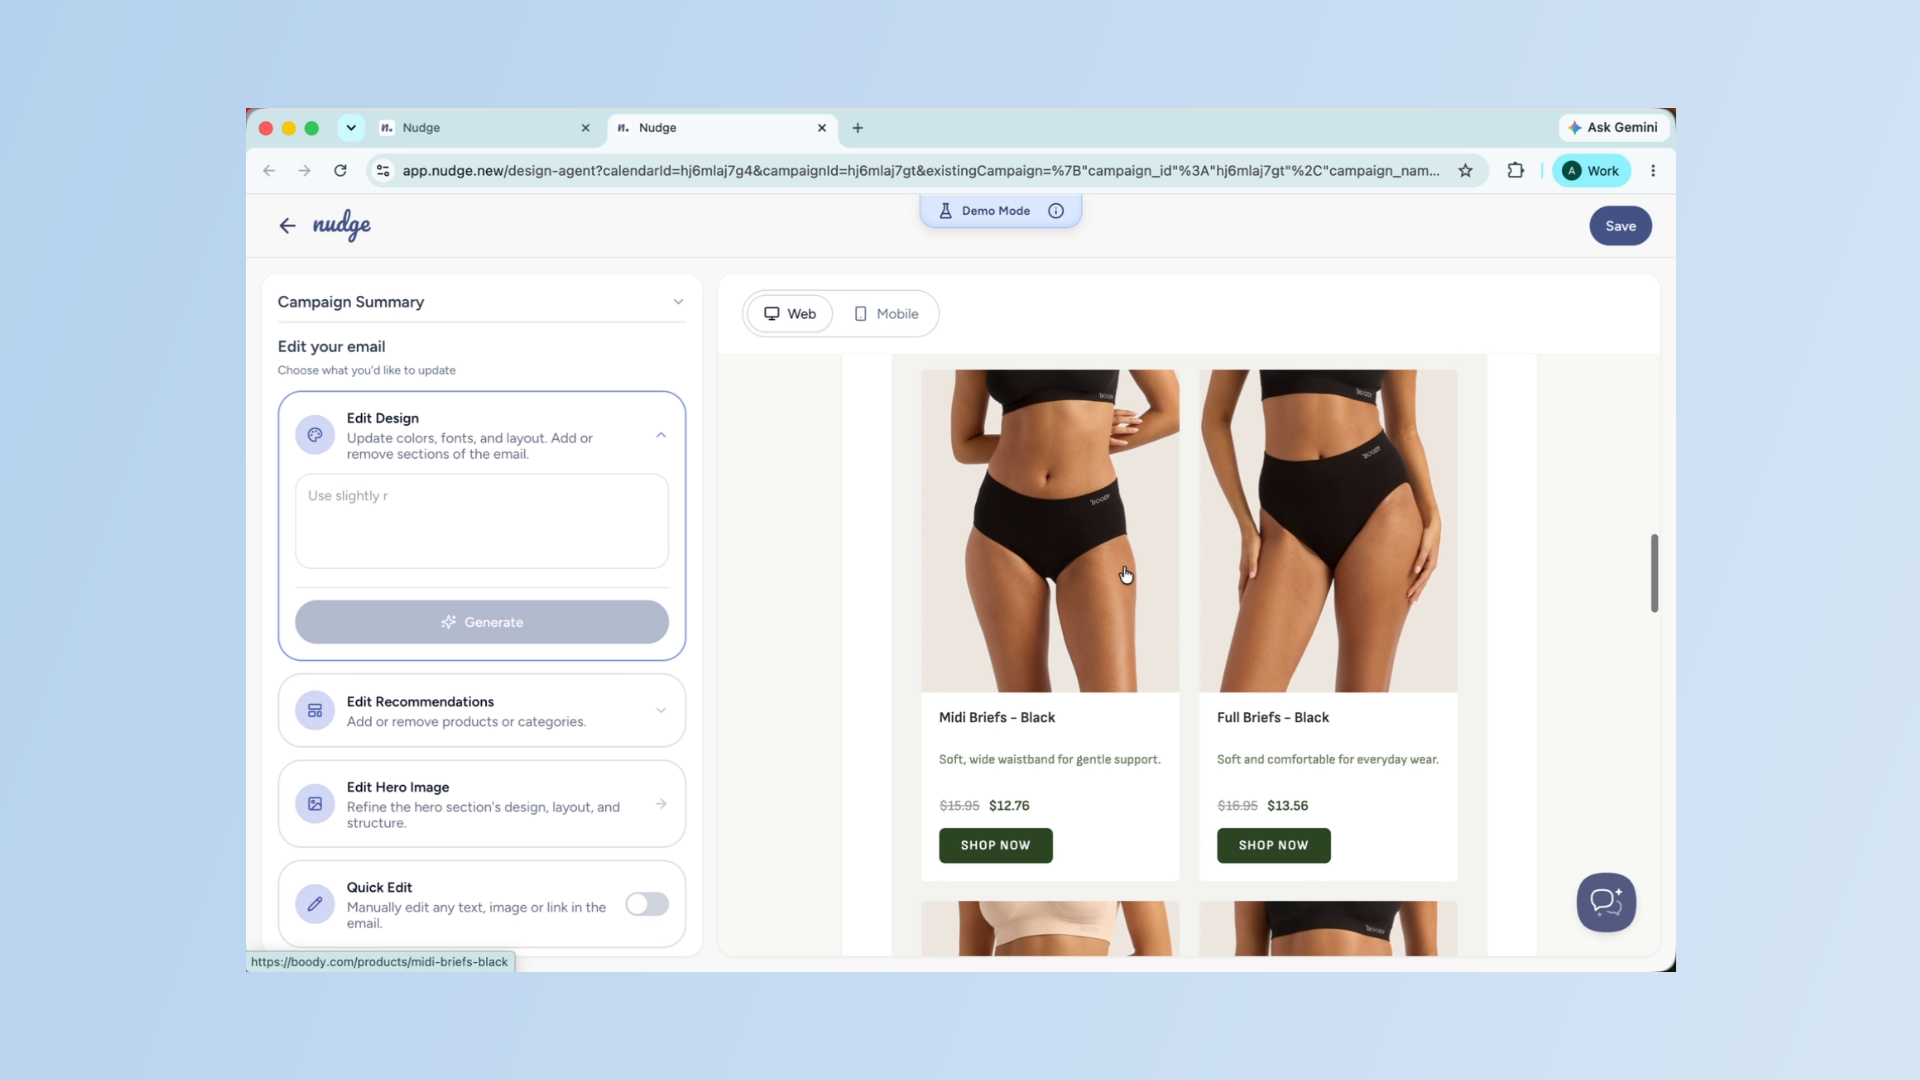
Edit Product Recommendations
If your email includes product recommendations, Edit Recommendations lets you control exactly what appears. You can switch between Products and Categories, select from your available range, or add custom product URLs manually. Products can be added, removed, and reordered using drag and drop, with a maximum of four products per email.
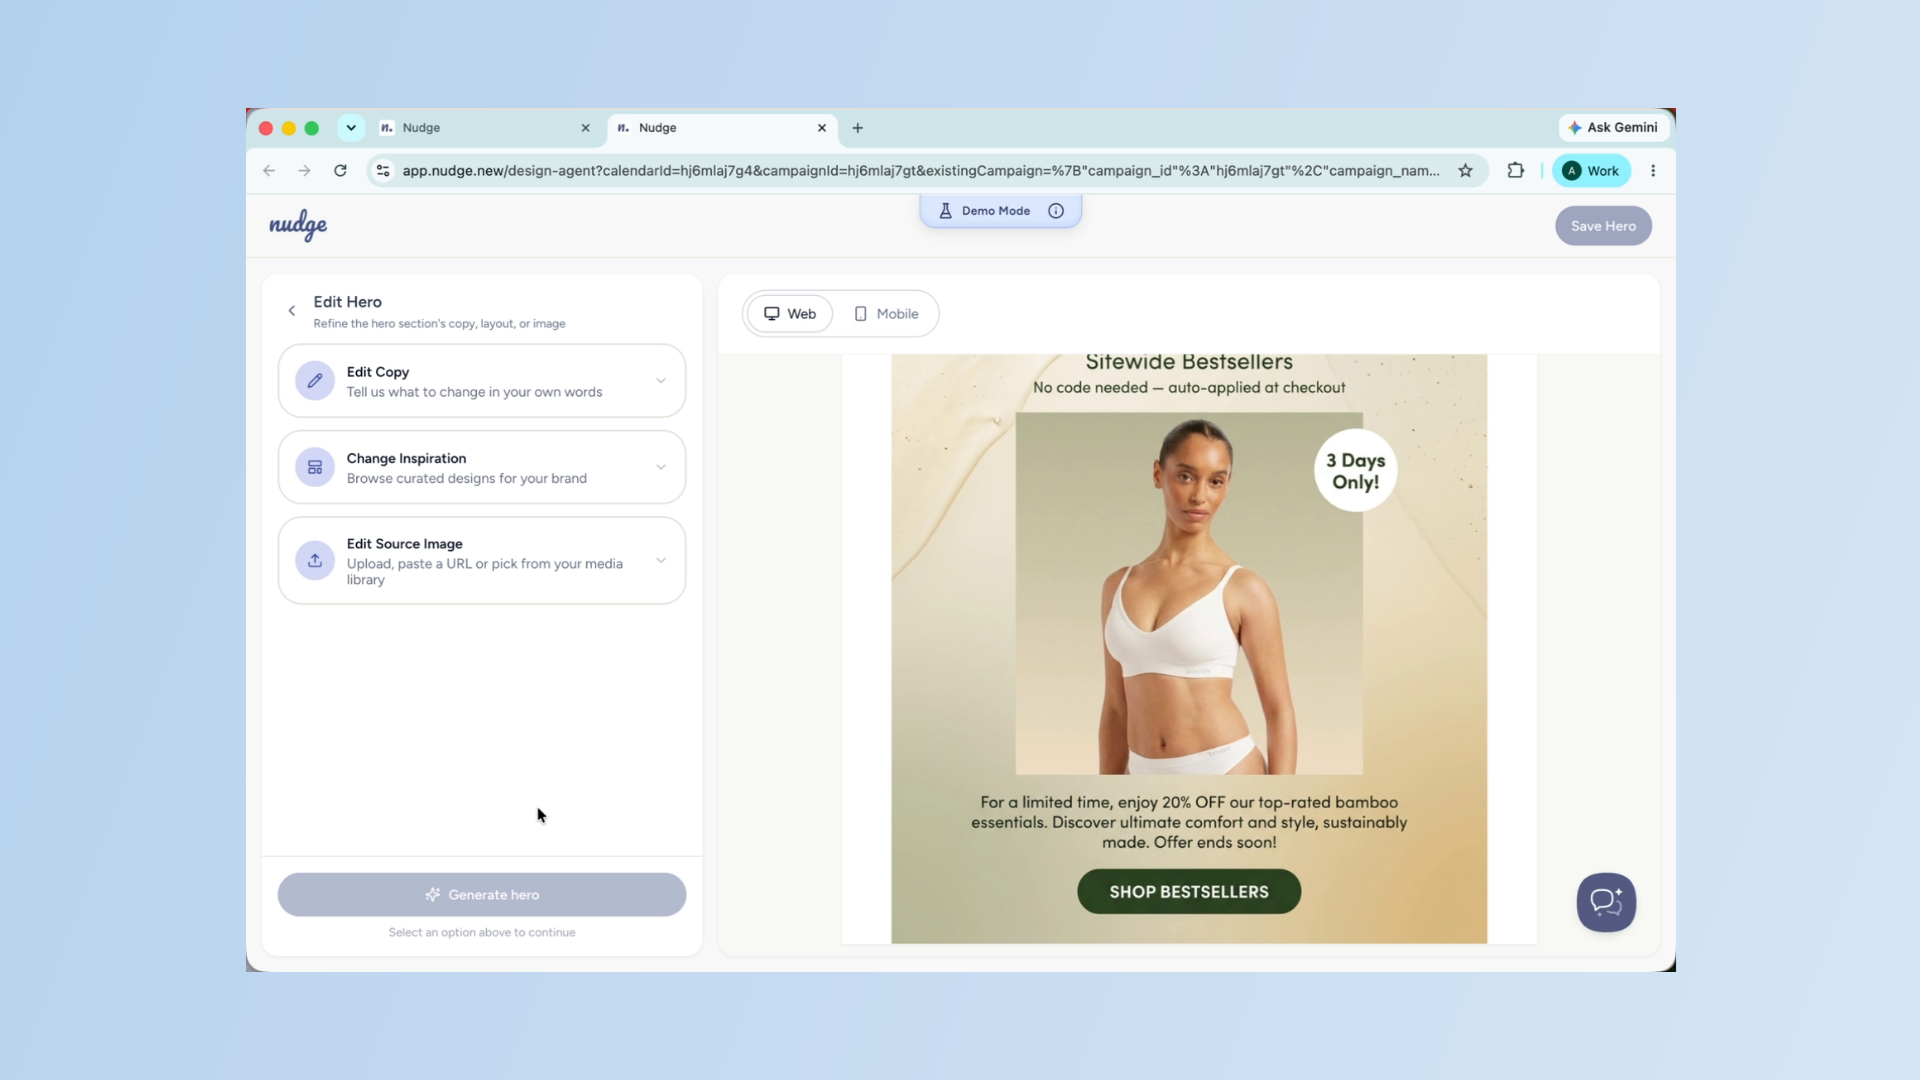
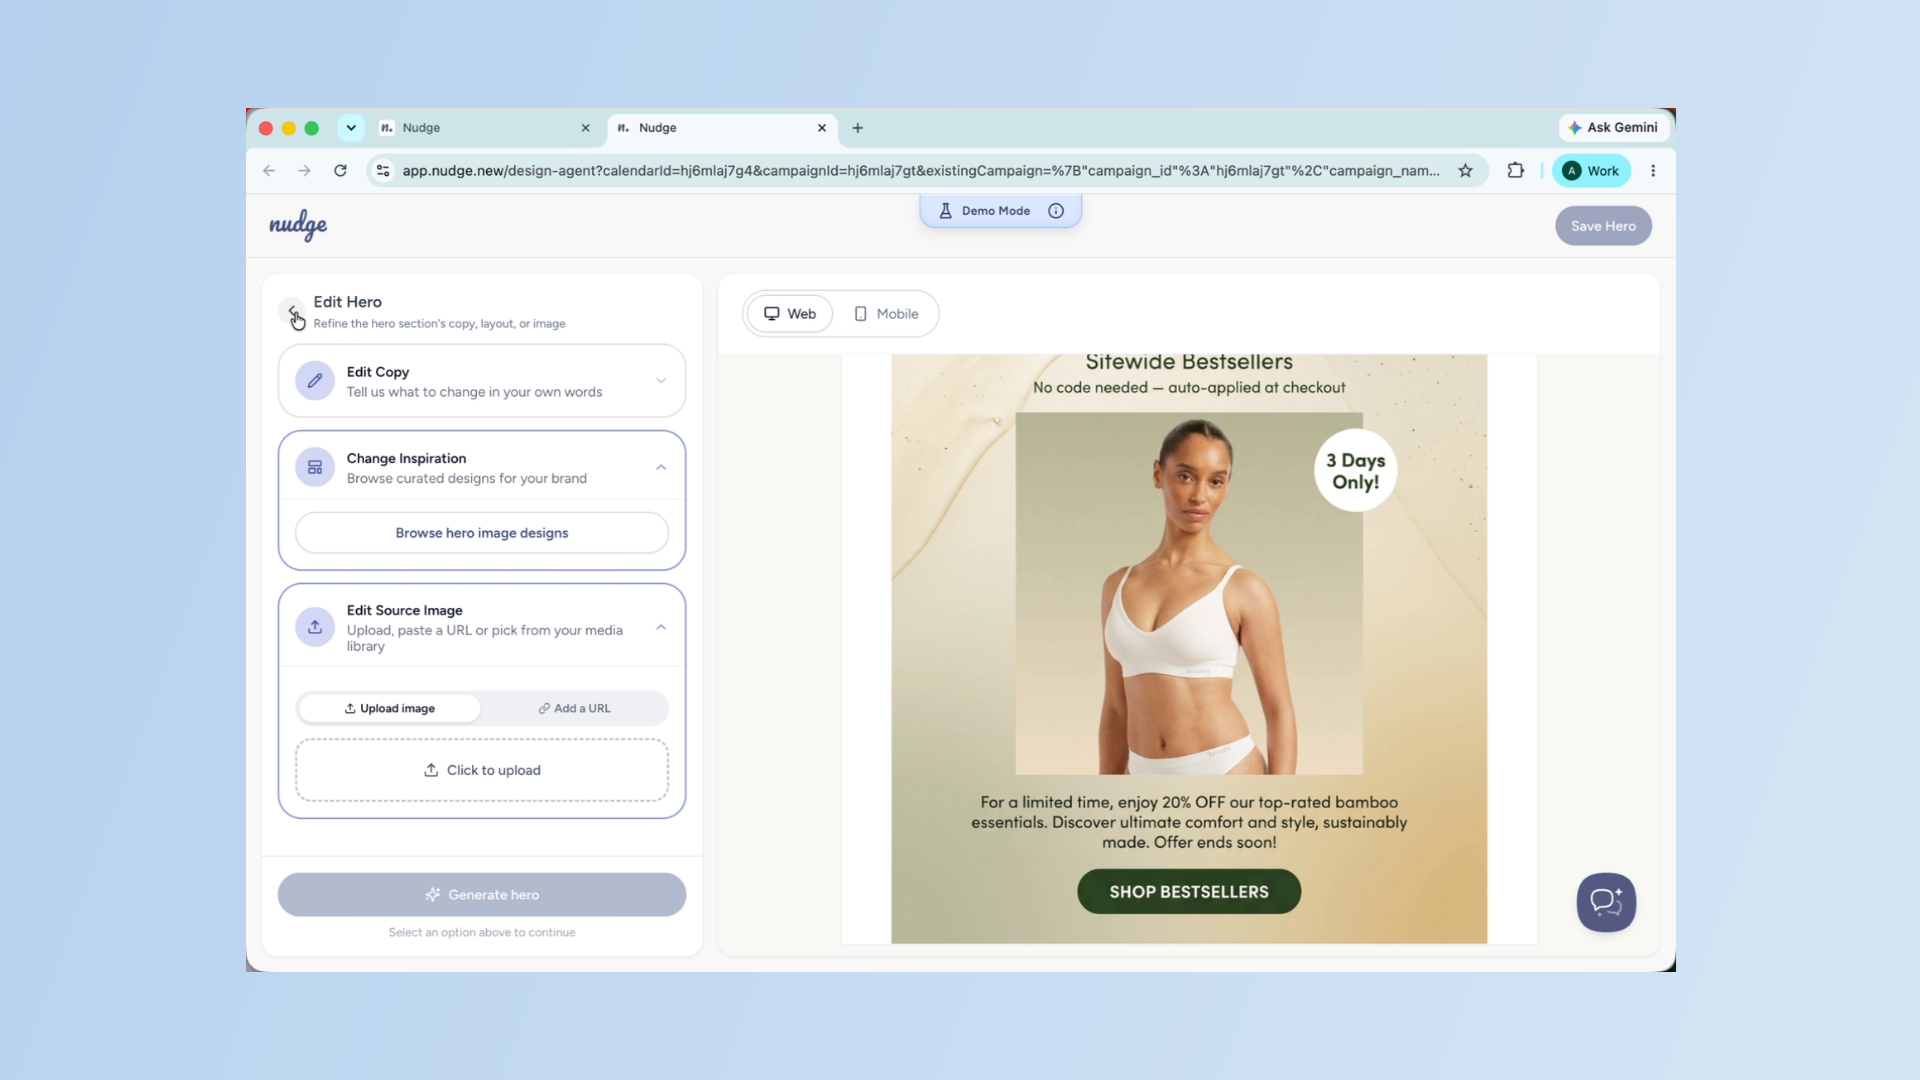
Open Hero Image Editor
The Edit Hero option opens the dedicated hero image editor.
Use Hero Image Editing Options
From here you have three options. Edit Copy lets you update the hero text — headings, subheadings, and CTAs. Change Inspiration lets you browse a library of hero designs and generate a new hero image based on a style you like. And Edit Source Image lets you replace the lifestyle image entirely, either by uploading one or providing a URL. Once you are happy with the hero, make sure to save it to apply it to your campaign.
Use Quick Edit On Canvas
Finally, Quick Edit lets you make direct edits on the email canvas itself, without going through the chat. Toggle it on and you can click directly on any text to edit it, update a redirect URL, or swap out an image by uploading a new one or pasting a URL. When you are done, hit Save Changes and everything is applied instantly.
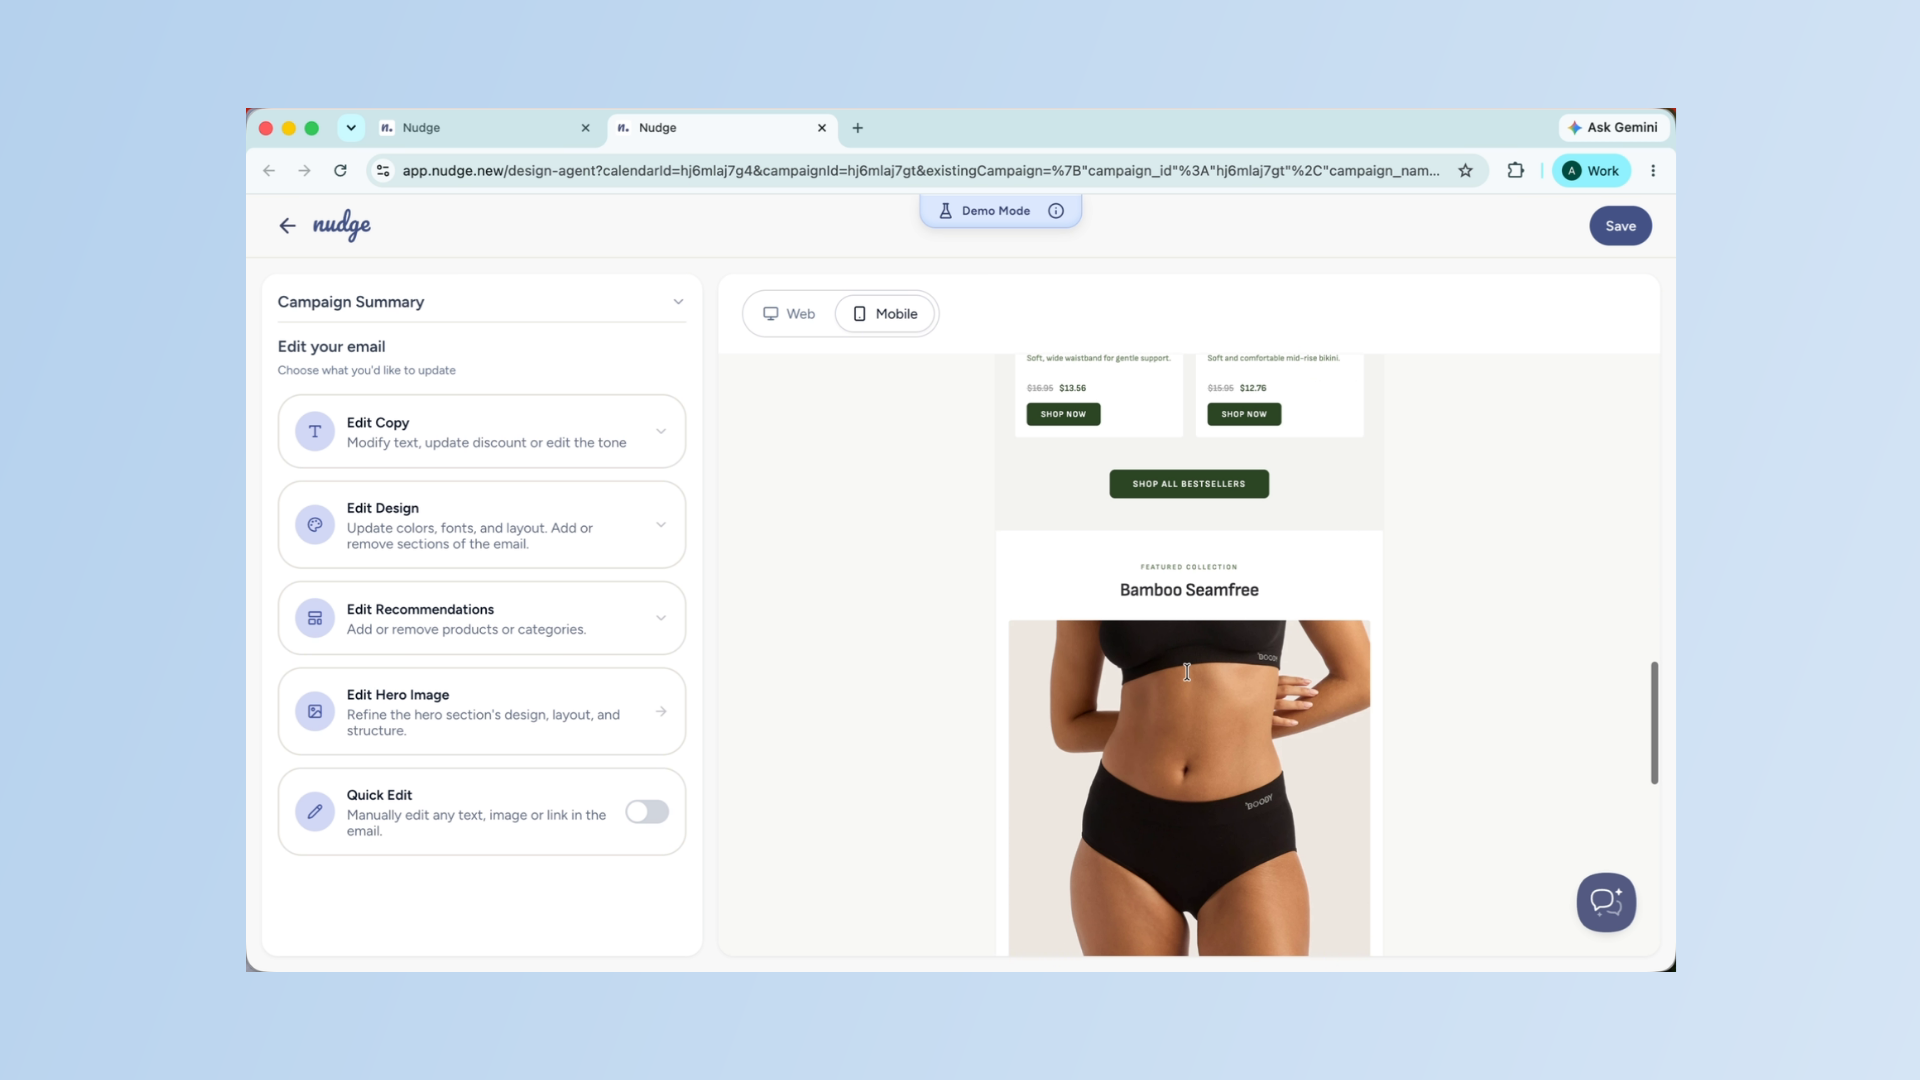
Preview Mobile Campaign Layout
Before saving, always switch to the mobile view to check how your email looks on a smaller screen. Most of your customers will open this on their phone, so it is worth making sure the layout and images hold up.
Save And Schedule Campaign
Once you are happy with everything, click Save Design.
Save And Schedule Campaign - Segment
Your campaign is now ready to be scheduled and sent to your audience.
And that is your first campaign done on Nudge! From a simple brief to a fully designed, personalised email — ready to send in just a few steps. When you are ready, check out our guide on scheduling your campaign to learn how to choose the perfect send time. See you in the next one!